I have displayed my final ideas onto presentation boards for my hand in on Monday, to show what I will be making. I am in the process of making #design 1, however would rather spend time on them making sure they are perfect for the show, than rush to get them done before hand-in.
Hannah Cane
Tuesday, 15 May 2012
Decided Handbags
The past week I have been working on my final designs for three handbags suitable for my degree show.
I have displayed my final ideas onto presentation boards for my hand in on Monday, to show what I will be making. I am in the process of making #design 1, however would rather spend time on them making sure they are perfect for the show, than rush to get them done before hand-in.
I have displayed my final ideas onto presentation boards for my hand in on Monday, to show what I will be making. I am in the process of making #design 1, however would rather spend time on them making sure they are perfect for the show, than rush to get them done before hand-in.
Friday, 4 May 2012
Reflectivity
Throughout the project I've been trying to keep a reflective journal. Subconciously, I think most of the time this is done in my head, because I'm constantly analysing my work, thinking what I like about it, - what I don't. In previous projects I've not really found that writing it down as a ''journal" has made much difference to me. But this year, I have found it really helpful! I think that physically writing it down, clarifies my choices more, and enables me to decide what points I should take forward and what points I shouldnt. I think this year it has been more helpful because I've done it throughout my sketchbook, as when its in a 'journal' I don't tend to look at it.
Because of my 'reflective journal', this has made my decision for which prints I shall be using as a final collection much easier.
Because of my 'reflective journal', this has made my decision for which prints I shall be using as a final collection much easier.
Wednesday, 2 May 2012
Back to uni work...
There has been a small change of plan with my uni work. Now that the degree show is drawing closer, I have started to work out what I want from the space.
The space essentially has two walls, so, I have decide for one wall, I shall display some prints from BA7, which were my favourite prints, and I shall be making them into summer skirts. I already have the fabric printed for two of them, so will probably have about four skirts overall. The prints were initially made for Premier Vision in Paris, and were the starting point for this final year of work. They are my favourite prints, and I planned to make them into skirts before anyway, so what better reason than for my degree show!
The space essentially has two walls, so, I have decide for one wall, I shall display some prints from BA7, which were my favourite prints, and I shall be making them into summer skirts. I already have the fabric printed for two of them, so will probably have about four skirts overall. The prints were initially made for Premier Vision in Paris, and were the starting point for this final year of work. They are my favourite prints, and I planned to make them into skirts before anyway, so what better reason than for my degree show!
The second wall will have a display of handbags. Origonally, I began this year aiming towards a final product of a handbag, but my mind changed half way through - and I don't really know why!
I've already got a seperate blog displaying handbags that I make and sell quite successfully so it would only make sense!
I have stated in my sketchbooks that the prints I have been doing this project havent stood out for me as much, which is why I have been working with manipulation. As I have developed further, I've began to realise that when the prints are manipulated they work really well as a decorative piece. So I've been trying to add them to skirts as a focus point rather than whole design of the skirt, but have now begun to realise that it works SO much better as a decorative piece on handbags!
The next few weeks I have left, I shall be working to investigate which samples work best together with which prints in order to make three final handbags for the degree show!
Big Fat Gypsy Wedding Style.
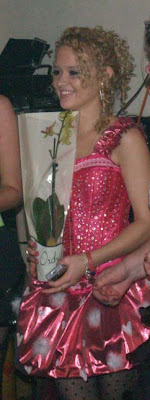
So as promised, here are some photo's of the Gypsy dresses I have been making! I only have some photo's from the party at the moment, but will get some better ones when I have some spare time.
This was the dress before....
Clare found it for £20 in a charity shop.
And after:
- dying it
- adding a new zip
- a corset tie back
- cutting the neck fabric away and adding a more modern strapless touch
- cutting off the sleeves
- adding a polyester lining to stop the itching of the net lining
- making bows from ribbon
- attaching flowers
- adding a extra front layer of blue dress net
- and a 6 hoop petticoat
AND
- a lot of guilt for cutting up someone's wedding dress....
Here we have it, a big fat gypsy wedding dress.... of sorts.
As well as, gluing 1000 beads to a pink corset, and making a puffy pink fluffy and with hearts skirt...
This was the only picture that shows the dress...I will get more!
This was the dress before....
Clare found it for £20 in a charity shop.
And after:
- dying it
- adding a new zip
- a corset tie back
- cutting the neck fabric away and adding a more modern strapless touch
- cutting off the sleeves
- adding a polyester lining to stop the itching of the net lining
- making bows from ribbon
- attaching flowers
- adding a extra front layer of blue dress net
- and a 6 hoop petticoat
AND
- a lot of guilt for cutting up someone's wedding dress....
Here we have it, a big fat gypsy wedding dress.... of sorts.
As well as, gluing 1000 beads to a pink corset, and making a puffy pink fluffy and with hearts skirt...
Friday, 27 April 2012
Project Update
So I've been busy working on my skirt collection for the past couple of weeks (as well as making a gypsy dresses - post will be uploaded!)
So far I have 3 final skirts with 2 more in process. The first one has come from the developments of accordian pleats, where I started to look at what happens when the pleats are looser, or thinner or sewn in places they shouldnt be. This lead on to me taking away parts of the fabric where I was eventually left with a 'loopy' effect..
This led me on to think about ways the loops could be added without seeing the join on the fabric. I had the idea that the loops could be pulled through the fabric somehow. From this, I created some hand woven samples and then pulled some of the yarns through to create loops in the fabric... (this was something I usually tried to avoid when weaving and knitting!) The whole process seemed to work well, so this developed into my first final product for BA8!
I am also in the process of creating two more in white and champagne.
So far I have 3 final skirts with 2 more in process. The first one has come from the developments of accordian pleats, where I started to look at what happens when the pleats are looser, or thinner or sewn in places they shouldnt be. This lead on to me taking away parts of the fabric where I was eventually left with a 'loopy' effect..
I am also in the process of creating two more in white and champagne.
The second skirt was another development from this where I looked at what happened when I played around with the loops. I worked with folding them, making them into cones, cutting them, and squashing them etc...
I really liked the squashing effect, so it was one I started working with first. I used one of my prints (A303) which was dedveloped from the marbling I did.
I havent yet, used my print designs to create the whole of a skirt, this is because my research has shown that block colours are very much 'in' this season. So, for the main part of my second skirt I have used a pre-ruffled fabric which, I then dyed to suit my colour scheme and intend to use my prints as a decorative effect.
I made the skirt first, and then explored the best fabrics for the prints to be printed on. I decided that for this skirt, printing on ribbon works really well!
By taking a picture of the skirt, it has allowed me to work on photoshop to work out how the printed squashed ribbon loops will work best, below are some of my ideas!
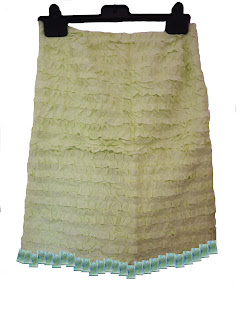
The third skirt that I designed, I aimed for a innocence and elegance which ties in with my theme. It is a bit more simple, and was developed through looking a the use of ruffles.
I havent yet had the chance to take photo's of these properly so apologies for the poor photography!
Tuesday, 10 April 2012
Mirror, Mirror
Yet again its been ages since I lasted posted!
I've been really busy over the last few weeks, doing uni work, making Gypsy fancy dress outfits (will be posted after the 21st!) and making handbags. Amongst this I have been having a bit of chill time too, and couldn't help posting about the film I went to see this week, called Mirror Mirror.
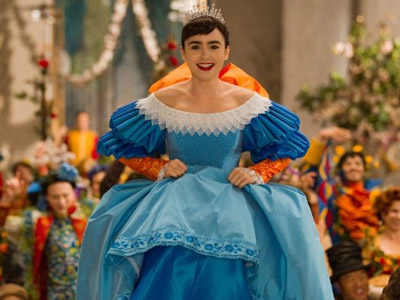
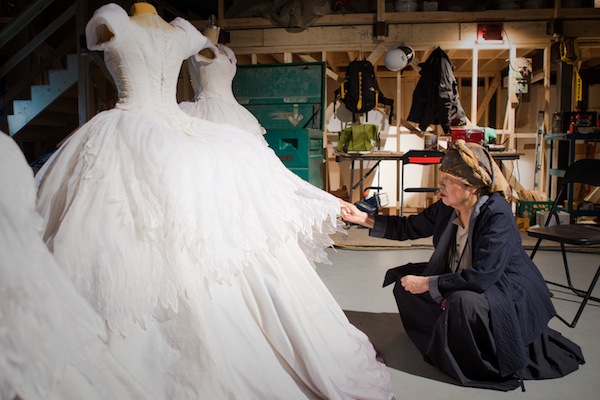
The film is a remake of Snow White, and the costumes are just AMAZING! Whilst watching I was taking mental notes of the use of tucks, pleats and gathers, to adopt into my work. Below I have posted some images of the costumes to share with you, utterly beautiful.
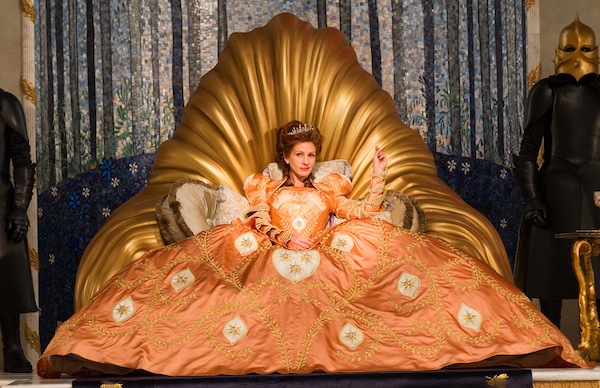
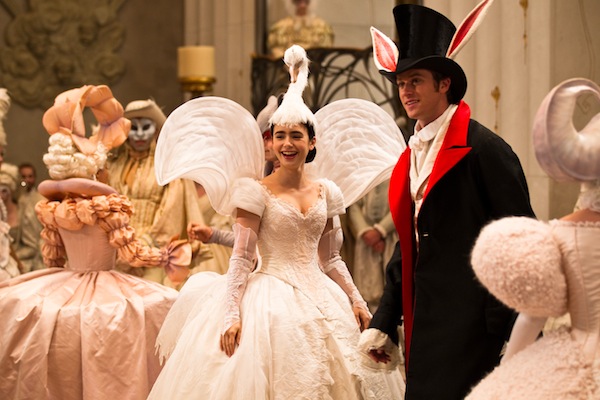
The amazing designer is Eiko Ishioka, who sadly died earlier this year. I think it is safe to say her, or her costumes will not be forgotten.
I've been really busy over the last few weeks, doing uni work, making Gypsy fancy dress outfits (will be posted after the 21st!) and making handbags. Amongst this I have been having a bit of chill time too, and couldn't help posting about the film I went to see this week, called Mirror Mirror.
The film is a remake of Snow White, and the costumes are just AMAZING! Whilst watching I was taking mental notes of the use of tucks, pleats and gathers, to adopt into my work. Below I have posted some images of the costumes to share with you, utterly beautiful.


The amazing designer is Eiko Ishioka, who sadly died earlier this year. I think it is safe to say her, or her costumes will not be forgotten.

Sunday, 11 March 2012
Developments
Over the last couple of weeks I have been developing my studio work. I've been very busy since my last post, so this may be a long one.
I have been playing around with pleats, tucks, and gathers as mentioned before, but found that I have been creating myself more work as I will most likely repeat these techniques on fabric again which have my designs printed on them. Therefore, the last few weeks I have been playing around with different design idea's.
The designs in my previous post were quite static and considering my theme is on movement I had hoped to make them a little more fluid. A whole sketchbook later, and the drawings I had created still weren't working well as a design once used in Photoshop. Therefore, following this I have decided to take a whole new approach to my drawing work.
The first approach I experimented with was dragging fabric through paint to capture the movement onto the materials. I then scanned these into Photoshop and below are some examples.
Although these designs are a little less static than the ones I began with, they're still not as fluid and 'lose' as I had hoped.
Another approach I tried in my drawing processes was dip and drip. This allowed the paint to find its own path on the paper...
Still not happy with the outcome, I decided a third and final approach. This was to experiment with Marbling, something I had done a realllly long time ago. This has worked perfectly! There is as little input as there could be from myself, meaning the outcomes are not controlled at all, however this does have its negatives. This means that the same design can not be created again easily.
I have carried out the same marbling techniques onto a Polyester Satin Kent
Some of the designs worked better than others, but I liked the unexpectedness of the whole process! Next, to devlope these, I am going to scan them into Photoshop and play around with erasing the sections that I don't like, for example some have splotches on them, and they'd look better without them.
On from this, I am going to experiment with using these marbled prints for pleating, and gathering etc, and see what results I get!
Lastly, I took a few pictures of the prints drying on the line, and some of them look good! Some really capture the organic movement I have been aiming for all along!
Subscribe to:
Comments (Atom)


